|
Photos and Instructions by R. Ted Jeo |
|
|
|
|
|
1) Make sure rifle is unloaded. Remove bolt by
pressing trigger and pulling bolt out of rifle. |
|
|
2) Remove trigger guard screws. |
|
|
3) Lift up and pull trigger/follower housing out of
stock. |
|
|
4) Remove screw on mid barrel band. Note: the back
side of this screw is a nut that includes a sling
swivel. |
|
|
5) Remove two screws on front barrel band. |
|
|
|
6) Slide mid barrel band and upper wood stock off of
rifle. |
|
|
|
7) Lift up approximate 2-3 cm on rear receiver,
pivoting barrel where it meets the front barrel
band. |
|
|
|
8) Barrel tilts upward and then slides forward,
clearing the barrel band as well as freeing the
bayonet lug carrier from the stock. |
|
|
|
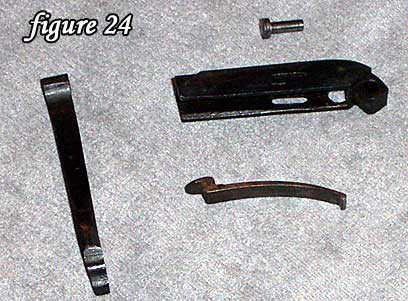
9) Major components of disassembled rifle. |
|
|
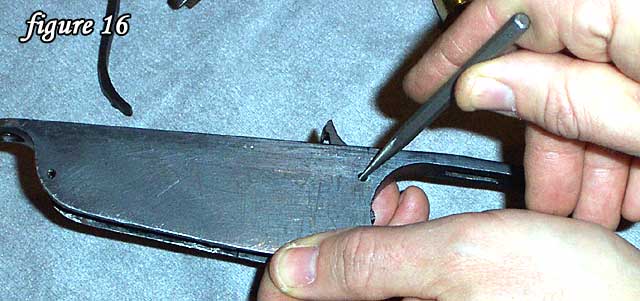
10) Remove sear pin from receiver and trigger group.
|
|

|
11) Trigger parts released by sear pin. On my rifle,
they basically all fell out once sear pin was
removed. |
|
|
12) On follower housing, remove the forward
retaining screw |
|
|
13) Using a flat screw driver, push follower through
hole behind the front trigger guard screw hole.
Follower assembly slides forward a bit then drops
out. |
|
|
14) Follower assembly as removed from follower
(trigger guard) housing. |
|

|
|
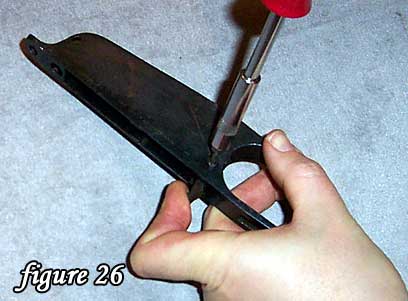
15) Remove retaining screw of clip latch. |
|
|
|
16) You may need to use a punch to push the screw
out because it is under spring tension. |
|

|
|
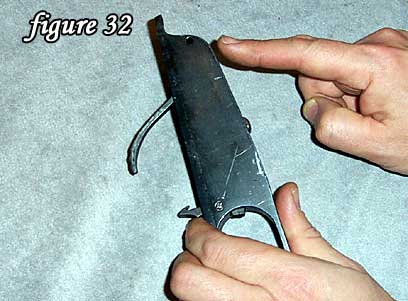
17) Parts of the clip latch mechanism removed from
follower housing. |
|

|
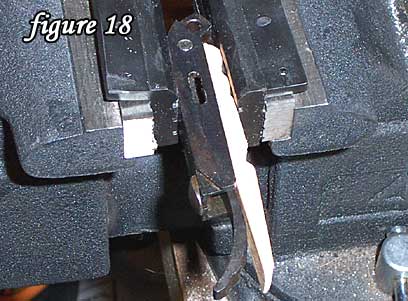
18) This is perhaps the hardest and trickiest part
of the Carcano rifle. I find that I don't have the
finger strength or dexterity to compress the flat
spring and pop out the retaining pin.
|
|

|
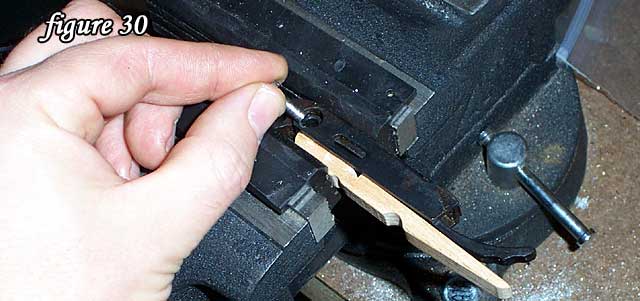
19) So, I devised an alternative method using ½ of a
wooden clothespin. I had to sand/file the sides of
the clothespin to fit in between the sides of the
follower holder. Then I slowly compress the entire
device in a vise. |
|

|
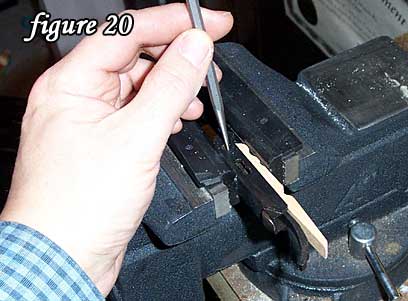
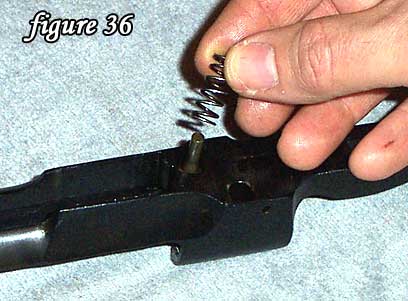
20) Once the tension is released, it is quite easy
to drift out the retaining pin. |
|

|
21) The parts of the follower. |
|

|
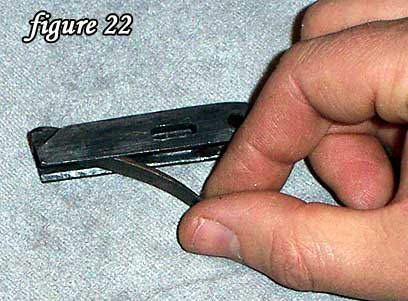
22) The flat spring can be removed from the housing
by tilting it upwards. |
|

|
23) Once the angle is enough, you will be able to
push/lift the flat spring out of the housing.
|
|

|
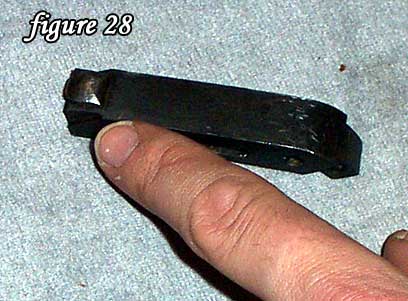
24) Follower parts. |
|
Reassembly Instructions |
|
|
25) Insert spring into clip latch and place latch
into housing. |
|
|
26) Depress latch and align holes in housing and
latch. Insert screw and tighten. |
|

|
27) Insert flat spring into follower housing, note
how the tab of the spring goes into the hole in the
housing. |
|
|
28) Once inserted, the tab will be flush with the
outside of the housing. |
|

|
|
29) Note the notch on the spring and how it aligns
with the follower. |
|
|
|
30) Using the same wood/vise combination, compress
the flat spring until the holes align and pop in the
retaining pin. Slowly release the vise, spring is
under tension. |
|
|
31) Insert follower assembly into trigger housing.
Tip rear end downward and the press the follower
assembly into place. |
|
|
32) Once the follower assembly is in place, it will
be perfectly flush with the outside of the trigger
housing (you may have to tap it lightly to get it
flush). |
|
|
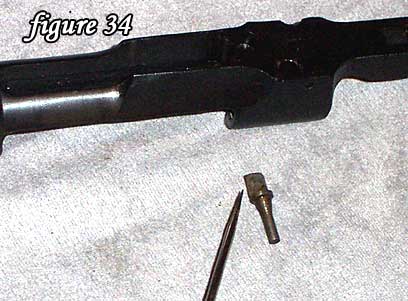
33) Insert forward retaining screw and tighten.
|
|
|
34) Note the straight flat face of the ejector.
|
|
|
35) Insert the ejector so that the straight flat
side faces forward. |
|
|
36) Attach the ejector spring. |
|
|
37) Note the pin on the side of the trigger
assembly. This is where the bolt stop (at front of
picture) will attach to. |
|
|
38) Note how the bolt stop attaches. |
|
|
39) Place the trigger assembly into receiver. Note
how the front hole aligns with the spring/ejector
assembly and how the bolt stop slides into its own
notch in the receiver. |
|
|
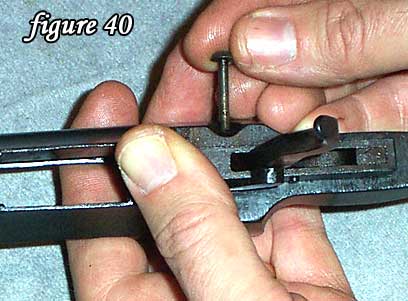
40) Press down on the trigger assembly and insert
the sear pin. |
|
|
|
41) Slide the front barrel band onto barrel. |
|

|
|
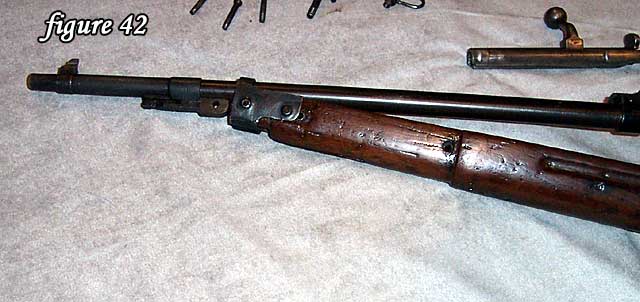
42) Slide stock under barrel band. At a slight
angle, slide stock/band forward until the bayonet
mount slides neatly onto the stock and the barrel
band is aligned with hole on bayonet mount. |
|
|
|
43) Receiver should drop right into the stock. |
|
|
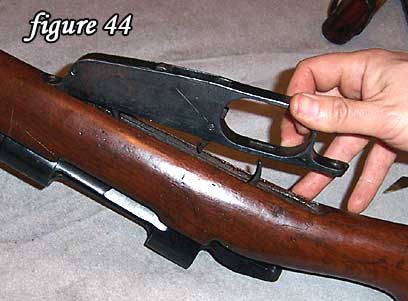
44) Insert the trigger guard. |
|
|
45) Replace and tighten the trigger guard screws and
tighten (longer screw is behind trigger). |
|
|
|
46) Slide the upper stock piece into position with
the mid barrel band. Note that the wood should be
properly fitted to the rear sight. |
|
|
47) Insert the swivel/nut on the mid barrel band.
Insert screw through other side, hold swivel/nut in
place and tighten screw. |
|
|
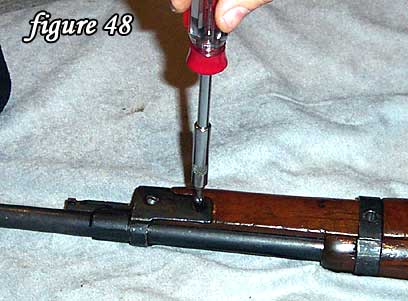
48) Insert and tighten the front barrel band screws. |
|

|
|
49) Insert bolt, press trigger and push bolt all the
way into place. The rifle is reassembled.
|
|
|